 By Caleb Morgan
Updated November 2026
A wall mount garden hose holder keeps your hose off the ground, out of the way and protected from kinks, mildew and sun damage. In this guide you will learn how to pick the right type of holder for your hose length, choose a spot that makes sense, mount it securely into wall material and store your hose properly afterward. The whole process takes most homeowners under an hour with basic tools.
What a Wall Mount Garden Hose Holder Does
A wall mount garden hose holder is a bracket, hook, reel or basket fixed to a vertical surface such as a fence post, siding, a shed wall or a brick exterior. It gives the hose a defined resting place so it does not get run over, dragged across beds or left in a tangled heap. Holders range from simple J-hooks that hang a coiled hose to enclosed reels that wind the hose in with a crank or spring.
Shopping for one? See our guide: 6 Best Garden Hose Reel Wall Mount Options of 2026.
Before you buy anything, it helps to know that “holder” covers several designs. A plain hook works for light coils. A cradle or basket holds a larger coil. A wall-mounted reel is the most convenient for daily use but takes more planning. If you are still weighing options, the overview in Holder for Garden Hose: How to Choose and Install One (Step-by-Step) covers the main categories in more detail.
Step 1: Measure Your Hose and Estimate Its Coil Size
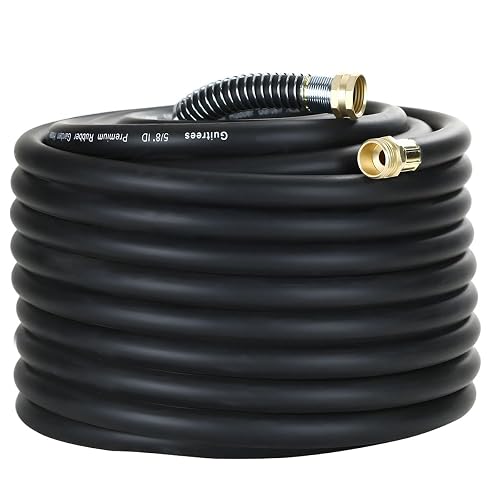
Start with the hose you actually own. Measure its length in feet and note its outside diameter, which is usually 5/8 inch for standard residential hose and 3/4 inch for heavier-duty or commercial lines. A 50-foot hose of 5/8-inch diameter, coiled loosely, typically forms a loop roughly 14 to 18 inches across and 8 to 10 inches tall when stacked in a figure-eight or loop pattern. Longer hoses and thicker diameters need more space.
Write down these numbers:
- Total hose length in feet (for example, 75 feet)
- Hose outside diameter (5/8 inch or 3/4 inch)
- Approximate coil diameter you can accommodate on the wall
- Whether you need to store the hose on a reel, a hook, or a basket
Manufacturers of hose reels and holders usually list a maximum hose length and diameter on the packaging or product page. Always check these specifications before buying, because a holder rated for 50 feet of 5/8-inch hose may not handle 100 feet of 3/4-inch hose without strain.
Step 2: Choose the Right Mounting Location
Placement determines how often you will actually use the holder. Pick a spot that is:
- Close to your primary spigot, ideally within 10 feet, so you are not dragging the hose across the lawn
- At a height of about 3 to 4 feet, which keeps the hose off the ground and easy to reach
- Out of direct sun for long stretches, since UV exposure makes rubber and vinyl brittle over time
- Away from high-traffic paths where the hose could be stepped on or tripped over
- Sheltered from freezing temperatures where possible, which also protects the holder finish
Also check the wall itself. A concrete or brick wall, a solid wood fence post or a wall stud behind siding will hold far more load than hollow vinyl or thin metal panels. If you cannot locate a stud, plan on using wall anchors rated for the weight you intend to hang.
Step 3: Gather Tools and Materials
Most installations need only a few common items. Having everything ready before you start prevents half-finished work on a ladder.
- Wall mount garden hose holder with its included hardware
- Electronic stud finder or a small magnet to locate fasteners
- Pencil and level for marking straight, even mounting lines
- Electric drill with bits sized to your fasteners and wall material
- Masonry bit if mounting into brick or concrete
- Appropriate wall anchors for hollow surfaces
- Screwdriver or socket set, depending on the hardware
- Tape measure
- Exterior-grade sealant or a rubber gasket if the wall is masonry or siding
Step 4: Mark and Pre-Drill Mounting Holes
Locate the Wall Framing
Run the stud finder across the wall at the height you chose. Mark both edges of the stud with light pencil lines. On a wood fence or post, you can usually drive fasteners directly into the wood without finding a stud, but still confirm the post is sound and not rotted at the base.
Set the Height and Level
Hold the holder against the wall and check its position with a level. Mark the screw locations through the mounting holes. If the holder has two or more holes, measure them to confirm the spacing matches the stud spacing, which is commonly 16 inches on center in North American construction.
Drill the Pilot Holes
Drill pilot holes slightly smaller than the screw diameter. For wood, a pilot about 70 to 80 percent of the screw’s core diameter prevents splitting. For masonry, drill to the depth specified by your anchor manufacturer, then clean out the dust with a brush or blast of air before inserting the anchor. Pilot holes help the holder sit flush and reduce the chance of cracked siding.
Step 5: Install the Holder Securely
Attach the bracket to the wall with the fasteners supplied. Tighten snugly, but do not overtighten, especially on plastic brackets, which can crack under excessive torque. Check that the holder is level and does not rock when you push on it. If it wobbles, back out the fasteners, reposition the holder or move to a stronger anchor point.
If you are mounting to siding, add a bead of exterior sealant under the flange or a rubber gasket between the bracket and the wall. This keeps water from seeping behind the mount and rotting the sheathing.
Step 6: Load and Test the Hose
Coil the hose in loose loops of roughly 12 to 18 inches in diameter, stacking them evenly and avoiding tight kinks. Hang or seat the coil on the holder, then gently pull on the hose and the holder to confirm everything is secure. If you are using a reel, wind a few feet at a time, watching the guide arm to ensure the hose lays flat across the drum rather than piling up on one side.
Run water through the hose once to check for leaks at the spigot connection and to make sure the hose drains properly when you disconnect it. Water trapped in the coil can freeze in cold climates and split the hose, so drain it fully after each use.
Choosing Between a Hook, Basket and Reel
Different holder styles suit different routines. The table below compares the main options by how they handle common needs.
| Holder Type | Best For | Installation Effort | Storage Neatness |
|---|---|---|---|
| Simple hook or bracket | Short hoses, light coils, occasional use | Low, one or two screws | Moderate; coil can slump |
| Cradle or basket | Medium to long hoses that need a stable base | Low to moderate | Good when the hose is coiled neatly |
| Wall-mounted reel | Daily use, longer hoses, tidy appearance | Moderate; needs solid anchors and clearance | Excellent; hose winds in cleanly |
For a wider look at reel models and what separates the sturdier designs, see 6 Best Heavy Duty Garden Hose Reel Wall Mount Options for Tidy Storage (2026) and Wall Mounted Garden Hose Reels: A Step-by-Step Installation and Buying Guide.
Factors That Affect Long-Term Performance
Material and Weather Resistance
Look for holders made from powder-coated steel, galvanized metal, UV-stabilized plastic or aluminum. Uncoated steel rusts quickly where it meets water, and cheap plastic can grow brittle after a few seasons of sun. If you live where winters are harsh, check whether the manufacturer specifies a temperature rating and whether the mechanism is designed to stay operational when cold.
Load Capacity
A full 100-foot hose of 5/8-inch diameter, especially when wet, weighs considerably more than an empty one. Choose a holder rated above the weight of your hose when full, and always check the manufacturer’s stated limit rather than guessing.
Mounting Surface
Wood posts, masonry, vinyl siding and metal sheathing each call for different fasteners. Using the wrong fastener is the most common reason holders pull loose. Match the hardware to the surface, not just to the bracket.
Common Mistakes
- Mounting too high. A holder above shoulder height makes lifting and coiling awkward and encourages people to drop the hose instead of hanging it.
- Skipping the level. A crooked holder causes uneven coils and puts stress on one side of the bracket.
- Using drywall anchors on exterior walls. Anchors designed for interior drywall will not hold a loaded hose outdoors.
- Leaving water in the hose. Standing water freezes, expands and can crack the hose, and it promotes mildew in the coil.
- Coiling tightly. Tight coils set kinks into the hose and reduce water flow over time.
- Ignoring sun exposure. A holder and hose left in full sun will age faster, so consider a shaded spot if one is available.
Tips for Better Results
- Install the holder before you have a full hose to hang, so you can test the fit with the actual spigot-to-holder distance.
- Position the holder so the hose enters the coil without sharp bends at the connection point.
- Use a hose quick connect at the spigot if you frequently switch attachments, which reduces wear on threads.
- Check fasteners twice a year, especially after heavy storms or winter freeze-thaw cycles.
- If you plan to add a nozzle, choose one that fits the same hose diameter, and see Top 7 Nozzles for Garden Hose Options Compared for Everyday Watering for options.
Recommended gear
A few supplies make the installation faster and the result more durable.
- Stud finder: Locating a stud before drilling prevents weak anchor points and surprises behind the wall. View on Amazon
- Masonry drill bit set: Needed for brick or concrete walls, where a standard wood bit will not cut cleanly. View on Amazon
- Exterior-grade sealant: Seals the gap where a bracket meets siding or masonry to keep water out of the wall. View on Amazon
- Heavy-duty wall anchors: Provide secure hold in hollow or masonry surfaces where a standard screw will not grip. View on Amazon
FAQ
Can I mount a garden hose holder on vinyl siding?
Yes, but anchor it to the underlying sheathing or a solid stud rather than the siding alone. Vinyl can crack under a loaded holder, so use a mounting block or reinforcing plate behind the siding if the bracket is heavy.
How high should a wall mount garden hose holder be?
Most people find 3 to 4 feet above ground works well. That keeps the hose off the lawn and puts the coil at a comfortable height for hanging and retrieving.
Do I need a stud to mount a holder?
Not always. On a solid wood fence post or masonry wall, you can anchor directly. On hollow walls, locate a stud or use anchors rated for the expected load.
What is the difference between a garden hose holder and a hose reel?
A holder simply supports a coiled hose, while a reel winds the hose in and out, usually with a crank or spring. Reels are more convenient for frequent use but require more mounting clearance.
Will a wall mounted holder work with a pressure washer hose?
Often yes, but check the hose diameter and weight first. Pressure washer hoses can be stiffer and heavier, so confirm the holder’s rated capacity and bend radius before installing.
How do I stop my hose from kinking on the holder?
Coil in loose loops, avoid stacking the hose over sharp edges, and make sure the holder has a generous radius. Storing the hose drained and in a single layer where possible also helps.
Should I drain the hose before storing it on the wall?
Yes. Drain the hose fully after each use, especially before freezing temperatures, to prevent cracks and mildew. Many gardeners disconnect the hose at the spigot and let gravity empty it.
Can I install a holder myself, or should I hire someone?
Most homeowners can install a holder with basic tools. If you are unsure about the wall structure, especially on a second-story exterior or older masonry, consult a professional contractor for advice.
Conclusion
A well-placed wall mount garden hose holder keeps your hose clean, protected and easy to reach. Measure your hose, pick a spot near the spigot at a comfortable height, and anchor the bracket into solid material with the right fasteners. With regular drainage and a quick fastener check each season, the holder will serve for years.
Ready to choose one?
About Caleb Morgan
Caleb Morgan is part of our editorial team and reviews and edits our garden hand tools & equipment guides, checking product details against manufacturer specifications and owner feedback.









Write Your Review
No reviews yet. Be the first to share your experience!