 By Caleb Morgan
An edging tool for garden use cuts a clean, vertical line between your lawn and your beds, walkways or driveway. Done well, the edge stays crisp for weeks, keeps grass from creeping into mulch, and makes the whole yard look cared for. This guide covers how to choose the right edger, how to set up and cut a straight border, how to maintain the blade, and where people usually go wrong.
What an Edging Tool for Garden Work Actually Does
Edging is a cut, not a dig. A good edging tool slices through turf roots at a shallow angle and leaves a defined trench, usually 2 to 3 inches deep, that acts as a barrier. The grass on the lawn side stays put, and mulch or soil on the bed side stays where you put it. Some people confuse edging with trenching or cultivating, but the job is narrower: you are defining a line, not loosening soil.
Types of Edging Tools and Which Fits Your Yard
Hand edgers come in a few distinct forms, and each suits a different amount of work.
- Half-moon edger: A semicircular steel blade on a long handle, pushed straight down with the foot. It handles short runs and tight curves well, and it is the most common choice for home gardeners with a few beds.
- Rotary or wheel edger: A small spinning blade that rolls along the line. It is quick on long, straight runs but less precise on curves.
- Stirrup or loop edger: A blade shaped like a loop that cuts in both directions as you pull or push. Useful for maintenance passes.
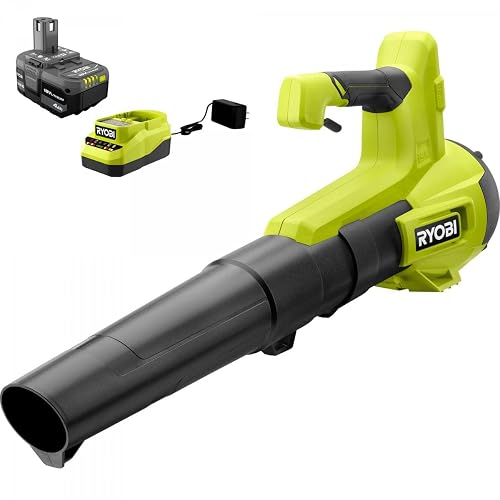
- Powered edgers: Gas, battery or corded machines with a spinning blade or string head. Good for large lawns, but they add noise, weight and maintenance.
For a typical suburban yard with a few beds, a half-moon hand edger covers most jobs. If you have long paths or several hundred feet of border, a wheel edger or a powered model saves real time. If you want to compare battery and gas options, Battery vs Gas vs Corded Garden Tools lays out the tradeoffs.
Choosing an Edging Tool for Garden Soil and Turf
Soil type affects how the blade behaves. In loose loam, almost any edger slices easily. In heavy clay or compacted ground, you need a blade with a sharp, thick edge and enough weight to drive it down without bouncing. Sandy soil lets the blade sink quickly but can collapse the trench sides, so you may need to re-cut the line after a rain.
Look at the blade width and steel thickness. Thicker steel resists bending when you hit roots. A blade about 6 to 8 inches across is a practical size for most hand work. The handle should reach your hip or waist when you stand upright, and the grip should feel comfortable with gloves on. If you dig a lot of heavy ground, Digging Tools for Clay Soil covers blade shapes that hold up better.
How to Cut a Straight, Lasting Edge: Step by Step
Step 1: Mark the line
Lay out the line with a garden hose, rope or spray paint. Curves look best when they are smooth arcs rather than tight kinks. Step back and check the shape from a distance before cutting.
Step 2: Moisten the ground
Water the area the day before, or water lightly an hour before cutting. Damp soil releases roots more easily and gives a cleaner trench. Avoid cutting into soggy ground, which smears and collapses.
Step 3: Set the blade angle
Hold the edger at roughly 45 degrees to the lawn for the first pass, then bring it upright for the final cut. A slight angle toward the lawn side keeps the grass edge from rolling into the bed.
Step 4: Make the first cut
Press the blade in about 2 to 3 inches, depending on the depth you want. Push steadily rather than stomping, and keep your strokes overlapping by a few inches so the line stays continuous.
Step 5: Remove the cut turf
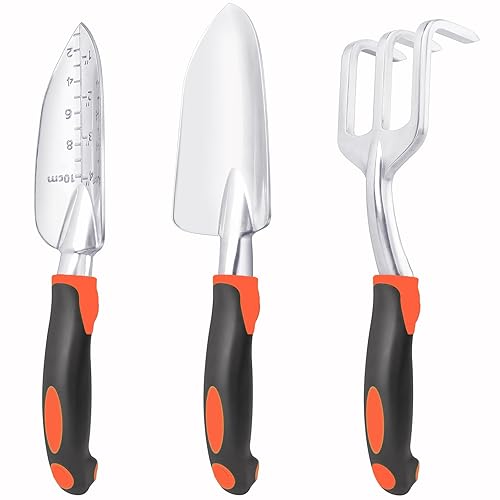
Lift out the strip of sod with a spade or hand trowel. Toss it to the compost or the bare spots in the lawn. Keep the trench clean so mulch does not settle back into it.
Step 6: Shape the bed side
Use the flat edge of a spade or a hand rake to square off the bed side of the trench. A small, neat step prevents mulch from spilling onto the grass.
Edging Depth and Spacing Reference
Depth and interval depend on what you are bordering. The table below gives general starting points. Adjust for your soil and how fast turf spreads in your region.
| Border type | Typical cut depth | Re-cut interval |
|---|---|---|
| Mulched flower bed | 2 to 3 inches | Every 4 to 6 weeks in growing season |
| Vegetable bed | 2 inches | Every 6 weeks |
| Paved path or patio | 1 to 2 inches | Every 2 to 3 months |
| Driveway or curb line | 1 to 2 inches | Two to four times per season |
Maintaining Your Edging Tool
A dull blade tears roots instead of cutting them, which leaves ragged edges and makes the job harder. Check the blade every few uses. Wipe off soil and sap, dry the metal, and inspect for bends or nicks. Keep the steel lightly oiled between seasons to prevent rust.
Sharpening the Blade
Use a flat mill file or a bench grinder with a light touch. Work along the bevel at the original angle, moving from the handle side outward. Stop when you see a fresh, bright edge along the cutting line. Remove burrs with a few light strokes on the back side. Wear eye protection and gloves when sharpening, and avoid overheating the steel, which can soften it. Keeping your tools sharp is part of a broader routine covered in Yard Tool Maintenance Guide: Clean, Sharpen, Oil, Store.
Storing the Tool
Hang the edger on a wall hook or rack with the blade facing down or protected by a cover. Storing it in a damp shed invites rust. A good storage setup helps everything last longer, as described in Garden Tool Storage Guide: Racks, Sheds and Walls.
Common Mistakes When Using an Edging Tool
- Cutting dry, hard ground, which causes bouncing and shallow, uneven trenches.
- Making the cut too shallow, so grass roots reach across and the line blurs within weeks.
- Edging too often at too great a depth, which thins the bed side and exposes roots.
- Letting the blade go dull, then forcing it harder, which tires your back and wrists.
- Skipping the cleanup step, so mulch and soil slide back into the trench.
- Working in wet, muddy conditions that smear the cut and compact the soil.
Tips for a Clean Edge All Season
- Edge after a light watering, not after heavy rain or during a drought.
- Keep a spade or hand trowel nearby so cleanup takes minutes, not an hour.
- Cut curves slightly larger than you think you need. Tight curves look fussy and are harder to maintain.
- Maintain the edge with light passes instead of waiting until the line has disappeared.
- Pair the edger with a Garden Trowel Guide: Choosing, Using and Caring for One for quick trench cleanup.
- For a full seasonal plan that includes edging, see Garden Tools by Season: What You Need and When.
Recommended gear
A half-moon hand edger with a thick, sharp steel blade is the most useful single tool for most yards, because it works on curves and short runs. Pair it with a mill file for quick touch-ups between seasons.
- Half-moon edger with long handle: Gives clean vertical cuts in both turf and loose soil. View on Amazon
- Mill file for blade sharpening: Lets you restore a clean cutting edge without power tools. View on Amazon
- Rotary wheel edger: Speeds up long straight borders where precision on curves matters less. View on Amazon
- Heavy-duty garden gloves: Protect hands from blisters and blade nicks during repeated cutting. View on Amazon
FAQ
How deep should an edging tool for garden cut?
Most beds do well with a trench 2 to 3 inches deep. Paved paths can use 1 to 2 inches. Deeper cuts hold mulch better but expose more root zone, so do not go deeper than you need.
How often should I re-edge my garden borders?
During the growing season, most beds need a light re-cut every 4 to 6 weeks. Hard surfaces like patios can go two to three months between passes.
Can I use a shovel instead of an edging tool?
You can, but a shovel makes wider, less precise cuts and is harder to keep straight. A dedicated edger gives a cleaner, more consistent line. Shovel vs Spade: Choosing Digging Tools explains when each tool makes sense.
When is the best time to edge my lawn?
Early spring and mid-to-late summer, when soil is moist and grass is actively growing, tend to give the cleanest results. Avoid edging during drought or on frozen ground.
Do powered edgers work better than hand tools?
Powered edgers cover large areas faster, but hand tools give more control on curves and in tight spaces. For a small or medium yard, a hand edger is usually enough.
How do I know when to sharpen the blade?
Sharpen when the blade tears roots instead of slicing them, or when you need extra force to push it in. A light file pass every few uses keeps the edge working well.
Should I use mulch right after edging?
Wait until the trench is cleaned and the bed side is shaped, then add mulch. Spreading mulch before cleanup lets it fall into the trench and blur the line.
Is it safe to edge near buried utility lines?
Keep cuts shallow near buried lines, and call your local utility-locating service before any digging deeper than a few inches. If you are unsure, consult a professional.
Conclusion
A well-chosen edging tool for garden use makes every bed and path look intentional and keeps grass where it belongs. Match the tool to your yard size, cut at a depth suited to the border, and keep the blade sharp. A short routine of light re-cuts through the season will do more than an occasional deep dig.
About Caleb Morgan
Caleb Morgan is part of our editorial team and reviews and edits our garden hand tools & equipment guides, checking product details against manufacturer specifications and owner feedback.








Write Your Review
No reviews yet. Be the first to share your experience!