 By Caleb Morgan
An organizer for garden tools keeps your shovels, rakes, pruners and hoses off the floor and within reach, which saves time every time you head outside. In this guide you will assess how much gear you actually own, choose the right type of organizer for your space, mount it safely, and set up zones that keep tools clean and easy to find. The whole process takes an afternoon for most garages and sheds.
Start by Inventorying What You Own
Before you buy anything, pull every tool out of the shed, garage corner or bin where it lives now. Group them by type and length. Long-handled tools like rakes, shovels and hoe handles need a different kind of support than hand tools such as trowels, cultivators and pruners. Many people discover duplicates or broken items during this step, and it is worth clearing those out first.
Shopping for one? See our guide: 8 Best Tools for Edging Garden Beds: Expert Picks Compared.
Measure Lengths and Count Items
Measure the longest tool you own, including the head. Most long-handled garden tools run between 48 and 60 inches, and some extension-length tools exceed 60 inches. Write the count next to each category. A household with two rakes, three shovels, a spading fork and two hoes needs roughly eight vertical slots, while a small patio gardener might need only three or four.
Sort Tools Into Use Categories
- Digging tools: shovels, spades, spading forks, digging bars
- Raking and sweeping: leaf rakes, bow rakes, push brooms
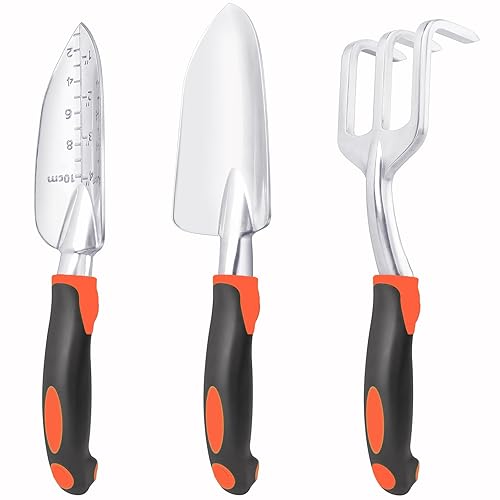
- Hand tools: trowels, hand forks, cultivators, weeders
- Cutting tools: pruners, loppers, hedge shears, folding saws
- Hose and water: hoses, nozzles, couplings, sprinklers
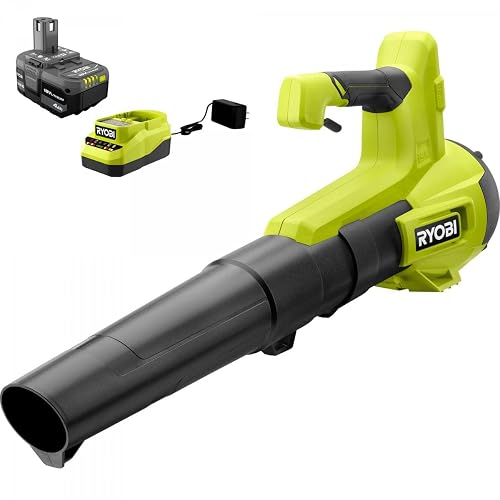
- Powered equipment: trimmers, blowers, tillers (stored separately if needed)
Sorting this way makes zoning easier later, because tools you reach for during the same task belong near each other.
Choose the Right Type of Organizer
Organizers fall into a few main families. Each suits a different space, tool mix and budget. Match your choice to your largest category and the wall or floor area you have available.
Wall-Mounted Tool Racks
Wall racks use horizontal rails or slotted boards with hooks to hold long-handled tools upright. They are the most common solution for sheds and garages. Look for rails made from steel or heavy-gauge metal, and check that the rack lists a load rating per hook or per foot. Racks with rubber-coated hooks protect handles and reduce scratches.
Hanging Hooks and Pegboard Systems
Pegboard with hooks works well for small hand tools, pruners, string and gloves. It is inexpensive to build and easy to rearrange. Use at least 3/4-inch-thick board and mount it on furring strips so the hooks can grip the handles securely. Heavy loppers and shovels should not rely on standard pegboard hooks alone.
Freestanding Tool Stands and Caddies
Freestanding stands hold long tools in a corner or against a fence without drilling into walls. They suit renters and people with masonry walls that resist anchors. Choose a base wide enough that the stand cannot tip when a tall rake is pulled out. Caddies with a tray or bins are useful for bulbs, seed packets and small hand tools.
Ceiling-Mounted Racks and Pulley Systems
Overhead racks free floor and wall space in garages. They fit ladders, folding chairs, long hoses and seasonal items. Confirm that your joists can carry the weight and that the rack clears garage door tracks and vehicle roofs. Pulley systems that lower and raise a storage platform are useful for seasonal gear you use only a few times a year.
Comparison at a Glance
| Organizer type | Best for | Installation effort | Main limitation |
|---|---|---|---|
| Wall rail rack | Long-handled tools in sheds and garages | Moderate (drill and anchor) | Needs solid wall studs or masonry anchors |
| Pegboard with hooks | Hand tools, pruners, gloves | Low to moderate | Weak for heavy loppers or shovels |
| Freestanding stand | Renters, patios, uneven walls | None | Takes floor space and can tip |
| Ceiling rack or pulley | Seasonal and bulky items | High (requires joist check) | Hard to reach, needs weight care |
Plan a Zone Layout That Matches How You Garden
A good layout places tools where your hands go during a task. Arrange the space in zones rather than a single pile of gear.
- Entry zone: Place frequently used items like gloves, pruners and a hand trowel near the door.
- Long-tool wall: Hang rakes, shovels and hoes on the longest open wall, handles up, heads down or on rails.
- Hose station: Mount a reel or hanger near a water source so the hose returns without tangling.
- Chemical and supply shelf: Store fertilizers, sprays and seeds on a high shelf away from children and pets, with labels facing out.
- Power equipment floor: Keep blowers, trimmers and tillers on the floor or a lower shelf, away from wet areas.
Keep at least 24 inches of clear floor in front of any rack so you can pull a tool out without knocking others down.
Mount and Install the Organizer Safely
Installation determines whether the organizer holds for years or pulls out of the wall with the first heavy shovel. Follow these steps for a wall rail rack, which is the most common setup.
- Find studs with a stud finder and mark their centers in pencil.
- Hold the rail level against the wall and mark the screw holes. Use a 4-foot level, not a short torpedo level, to keep the line straight.
- Drill pilot holes slightly smaller than the screw diameter, about 3/16 inch for a standard 3-inch lag screw.
- Drive lag screws into studs with a socket wrench. Snug them firmly without stripping the wood.
- Test the rail by pulling down on it with moderate force before hanging tools.
On masonry or concrete walls, use appropriate wall anchors rated for the load and drill with a masonry bit. If you are unsure about structural attachments, especially to ceilings or older framing, consult a qualified contractor or handyman before loading the rack.
Tools and Supplies You Will Need
- Stud finder and pencil
- 4-foot level
- Drill with wood and masonry bits
- Socket wrench or impact driver
- Lag screws or wall anchors sized to the rack
- Measuring tape
- Rubber mallet for seating hooks and rails
Keep Tools Clean and Ready While Stored
An organizer only helps if tools stay in good shape on it. Wipe soil and sap off blades and heads after each use. Hang tools so moisture drains away from the metal, not toward the joint between head and handle. Store pruners and loppers slightly open or with the lock engaged to relieve spring tension. For guidance on sharpening and oiling, the site’s maintenance guide covers the full routine. If you are deciding how long your rack should be, the seasonal planning guide can help you match storage to the year.
Common Mistakes
- Mounting into drywall alone. Plasterboard cannot hold a loaded rack. Always anchor into studs or masonry.
- Hanging loppers by the blades. Sharp edges can nick, and the tool can slip. Hang them by the handle with the blade cover on.
- Overloading one hook. Spread weight across several hooks rather than piling three shovels on one.
- Ignoring clearance. If the rack sits too close to a door track or cabinet, you will fight it every time.
- Storing wet tools. Rust starts quickly in damp sheds. Dry tools before hanging them.
- Choosing by appearance alone. A stylish rack that cannot hold your heaviest tool wastes money and space.
Tips for a Tidy Long-Term Setup
- Label hooks or bins with painted outlines so tools return to the same spot.
- Leave a small gap, about 2 inches, between tool handles on rails so you can grip them without bumping neighbors.
- Review your setup each season and remove tools you have stopped using.
- Use a small magnetic strip for metal hand tools like trowels and shears where wall space is limited.
- Keep a bucket of sand mixed with oil near the door for quick cleaning of muddy tool heads.
Recommended gear
Several products fit common organizer needs. Choose the type that matches your tool mix and wall construction.
- Wall-mounted steel tool rack with hooks: Holds several long-handled tools upright and keeps handles off the floor. View on Amazon
- Heavy-duty freestanding tool stand: Useful for renters and patios where drilling is not an option. View on Amazon
- Pegboard hook kit: Organizes pruners, gloves and small hand tools on a shed wall. View on Amazon
- Wall-mounted hose hanger: Keeps the hose off the ground and near the water source. View on Amazon
For more on matching storage to your garden’s needs, see Garden Tool Storage Guide: Racks, Sheds and Walls and Garden Tools by Season: What You Need and When. If you are still building your toolkit, Essential Garden Tools for Beginners explains which items deserve space on the rack first.
FAQ
What is the best organizer for garden tools in a small shed?
A wall-mounted rail rack with hooks usually gives the most storage per square foot. It keeps long-handled tools vertical and leaves floor space open.
How high should I mount a tool rack?
Mount the lowest rail so the bottom of the tool heads sits about 6 to 12 inches above the floor. Top rails should be reachable without a step stool for most adults.
Can I store garden tools in a garage without a dedicated shed?
Yes. Wall racks, overhead racks and freestanding stands all work in garages. Make sure clearance around garage doors and vehicles is maintained.
How do I keep pruners and loppers from rusting on the rack?
Dry them after use, wipe the blades with a light oil, and store them in a low-humidity area. Hanging them with the spring relaxed also reduces wear.
Is pegboard strong enough for heavy garden tools?
Standard pegboard suits hand tools and light items. Heavy shovels, forks and loppers are better supported by steel rails or sturdy hooks fixed into studs.
How much wall space do I need for a typical garden tool set?
A set of four to six long-handled tools usually needs about 4 to 6 feet of horizontal rail, plus space for hand tools on a pegboard or shelf.
Should I hire a professional to install a heavy organizer?
If you are mounting to plaster, masonry, ceilings or older framing and are unsure of the structure, consult a qualified contractor to confirm the anchoring is safe.
Conclusion
A well-planned organizer for garden tools saves time, protects your tools and makes the shed easier to use. Start by inventorying and sorting your gear, then choose a system that fits your space and tool lengths. Mount it into solid structure, arrange zones around your tasks, and keep tools dry and clean. A few hours of setup will pay off every season.
Related reading
Ready to choose one?
About Caleb Morgan
Caleb Morgan is part of our editorial team and reviews and edits our garden hand tools & equipment guides, checking product details against manufacturer specifications and owner feedback.








Write Your Review
No reviews yet. Be the first to share your experience!